
Check out @smith_bros on Instagram
Sometimes I like to make things and sometimes I need to make things. Often it’s both at the same time.
Here’s what the process looks like below for a recent project. This was to replace a leather laptop sleeve I made that got stolen recently.
Step 1: Make a plan and then make a pattern
The photo for this is up top. The glass of red wine is optional. And by optional I mean that you can swap it out for whisky.
Step 2: Cut out the leather
It’s super important to use the sharpest cutting implements you can get your hands on.

Step 3: Burnish the edges I won’t be able to get to later
I use a Dremel now, but you can do this manually which is how I started out.

Step 4: Add an edge crease on the strap closure
This is purely for decoration, but it adds a nice touch.

Step 5: Glue the sides
Yes those are those funny bulldog paper clip things clamping it all together.

Step 6: Glue and clamp the closure strap
This strap will hold the flap down.

Step 7: Tidy up the edges
I use a sanding piece on the Dremel to tidy up the glue after it’s dried and before burnishing the glued edges.

Step 8: Scribe the stitch line
A pair of callipers is useful for this.

Step 9: Hand punch stitching holes
These guys are called pricking irons. I have a couple of sets, but these are the nicest ones.

Here you can see both sides punched but not stitched. The thing with a handle is called a maul.

And here’s a close up

Step 10: Thread the needles
This can be a bit tricky when you’re starting out. Or if you’re going blind…!

Step 11: Stitch up the sides
This is saddle stitching… as in old-school stitching that they used for saddlery. Still used today but less so.

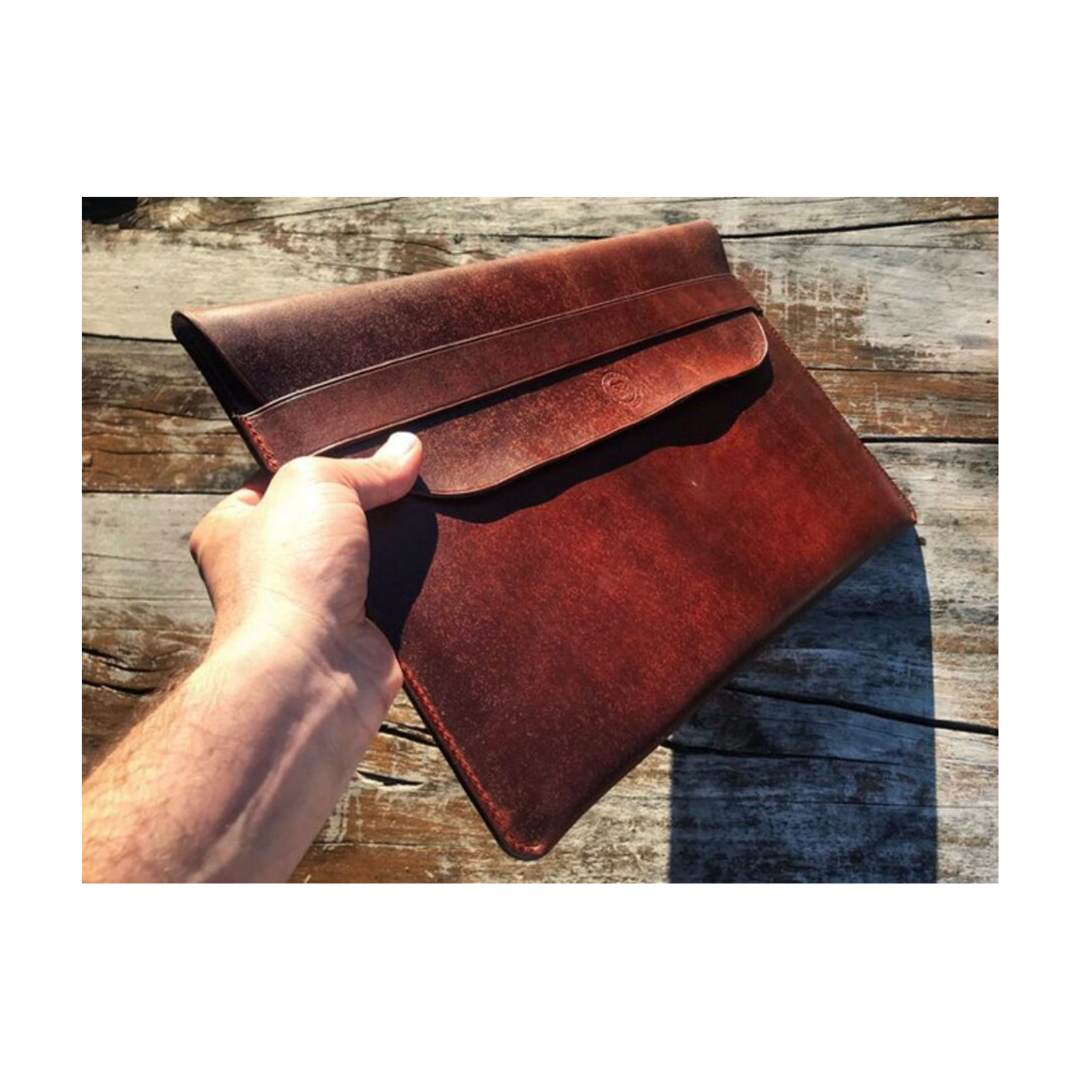
And then… [after some time] Voila…!
This has also had a polish with some beeswax based leather conditioner.

Here it is with the evening sunlight reflecting off the leather

Now my laptop has a new sleeve to keep it safe.

If you enjoyed this, then please follow @smith_bros on Instagram or check out my gallery here.
Kia ora! Hey, I'd love to know what you think.